1. Introduction
1.1. Zauzoo s.r.o.
We know how to make your business easier
For fifteen years we have successfully combined our jobs with our hobby - tailor-made software design and implementation. This combination of enjoyment and experience has enabled our clients to get ahead of their competitors. It really works - try it for yourself!
Address: Nad Kajetánkou 1783/13, 169 00 Praha 6, Czech Republic
Branch: JUDr. Krpaty 1147, 530 03 Pardubice, Czech Republic
Email: support@zauzoo.com
Phone: +420 777 481 622
2. ZZ Navigation
2.1. Grids
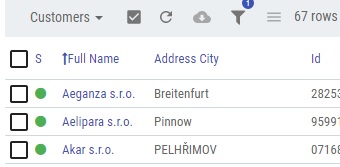
Each menu in the ZZ where the records are opened will display a list of these records after selecting it. In ZZ we call this list the GRID.
Navigation bar in the Grids

2.1.1. Search field
You can use the search field to search by more specified columns and conditions in one. It is defined for each Grid extra. This allows you to find a specific records the fastest way. These columns and conditions can be changed on your requirement by our ZZ support team.
TIP: If you hover with mouse pointer over the search magnifying glass icon, it tells you all of the categories and conditions that you can search by.

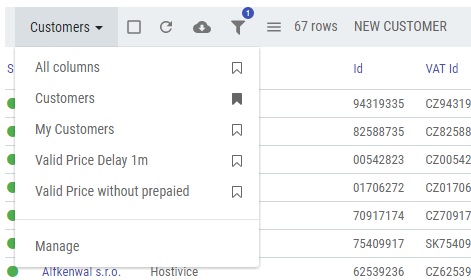
2.1.2. Grid selection
In this menu you can choose different Grids(if exists more) for the same main menu. Each grid can have its own columns, sorting and filtering. User can check the flag on the right side which grid will be opened by default when click on main menu.
Manage Grid
This menu is for creating your own grids. You can create your own grid either by copying an existing one or by making a new one. You can also modify existing Grid but only in case of enough permition rights.
-
New Grid. In this section you must set name of the Grid and level of the Grid. Depending on the user’s rights, you can set the grid level. Global = All users can see and use this Grid. Tenant group = Users from same group can see and use this Grid. Tenant = Users from the choosen tenant can see and use this Grid. User = Only the User can see and use this grid but across all the ZZ tenants he has access to.

-
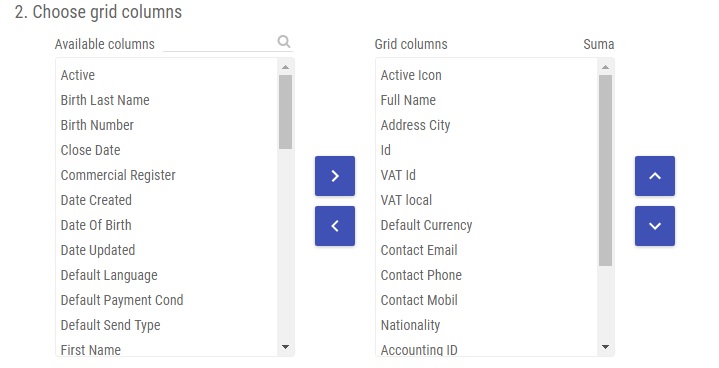
Choose Grid Columns. In this section you can choose which columns you want to see and set in which order.
-
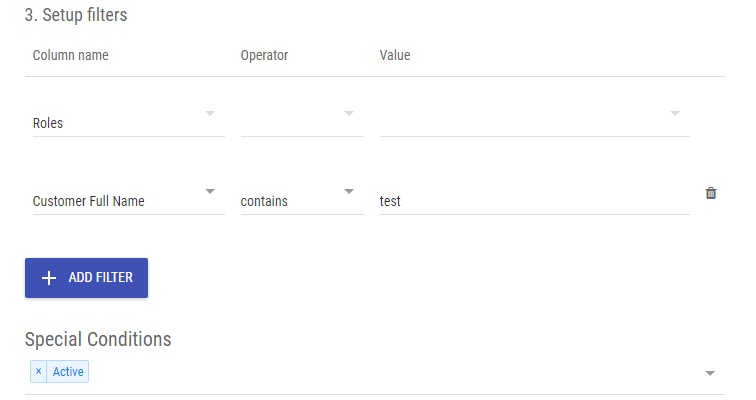
Setup Grid Filters. In this section you will set the conditions for Grid to display only your required records. There are two options for the filtering. First is to create your own condition. Second is to use Special Conditions. Advantage for Special Conditions is that you can deactivate them later when Grid was already started unlike the first option.
-
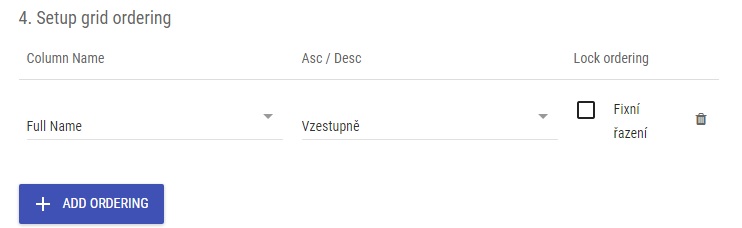
Grid Ordering. In this section you can choose the order (ascending / descending) according to your selected columns.
2.1.3. Check box
Activates checkboxes for individual record selection. These selected records are used in functions point Export records or Introduction.
2.1.4. Refresh records
Refresh of all records in the Grid.
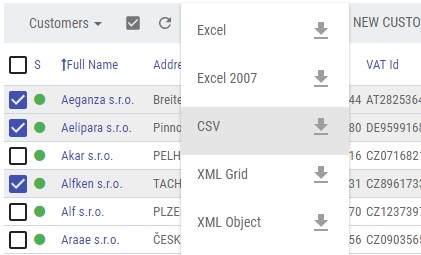
2.1.5. Export records
Exports all (or Check box) records from the Grid to choosen format. The export functionality exports only columns shown in the grid. In case you need to export other columns you have to choose a Grid selection or create your own grid. Click the text on the left in the menu if you want to open it immediately in default desktop application. Or for download to the file system, click the arrow icon on the right part of the menu.
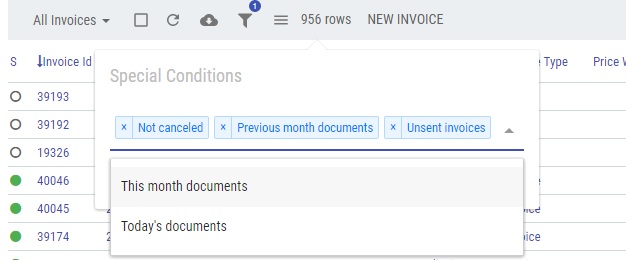
2.1.6. Special Conditions
If it is not possible to filter the records by Search field or individual column filters there must be prepared by our support team special condition which will filter the records you exactly need. You can combine more conditions together. After choosing the correct ones you activate the condition by Ok button.
2.1.7. Bulk actions
Starts the function for all (or Check box) records. There are two standard functions Update rows and Delete rows you can find in each Grid. Other bulk functions are individual with its functionality related to its main menu meaning.
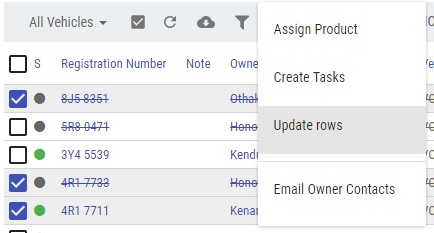
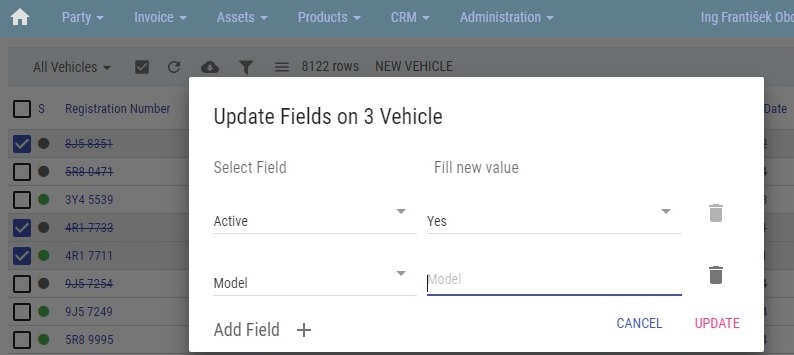
Update rows
Bulk change feature. Function updates all (or Check box) records for choosen columns with new values.
TIP: You want to Close or Open more records. Choose the records Call update rows function Select field Active and put value No or Yes.
Delete rows
Bulk delete feature. Function deletes all (or Check box) records.
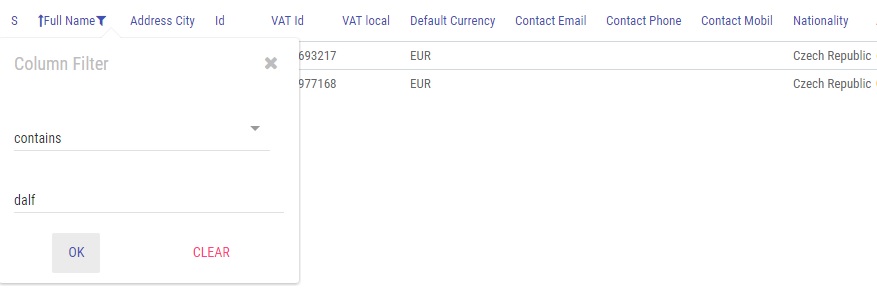
2.1.8. Column filter
You can use a filter for each column used in Grid. You click on the filter icon to the right of the column header. Then you choose type of condition. Bellow this condition you put parameter value which will be compared with the condition. With OK button you activate the Column filter. You can also activate more columns filters together. To deactivate choose button CLEAR.
2.2. Form Navigation Bar
Once you enter the detail of any record in the ZZ the same Navigation Bar will appear for any kind of record.

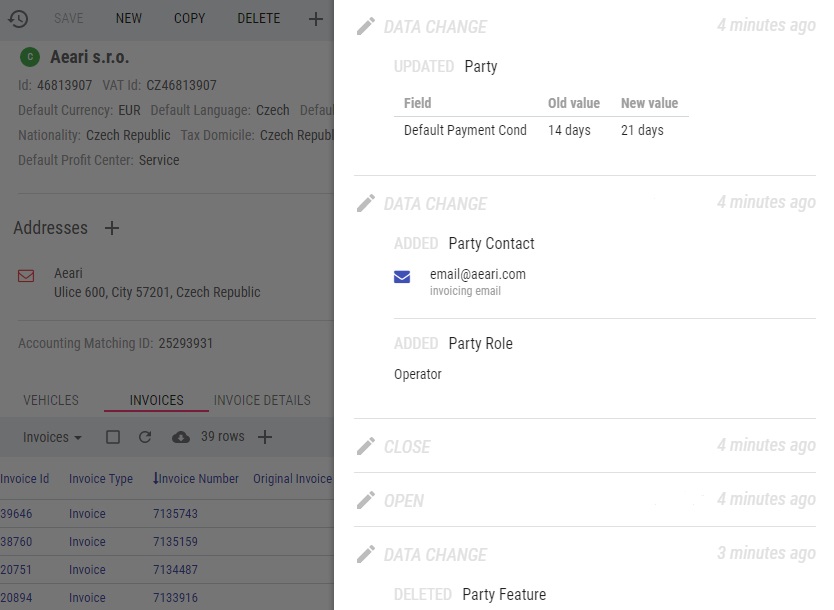
2.2.1. History Log
Any changes to the record are stored in the history module to accurately identify who when and what has been changed.
2.2.2. Save
Button to save any changes to the opened record.
2.2.3. New
Button to create new record.
TIPS: When creating new record, ZZ can fill in any field with default value or require as mandatory. If you want any settings concerning default values or if you want to have any fields mandatory please contact our support team.
2.2.4. Copy
Button if you want to create new record with same values as in open one. Copy of the records is very usefull when you need to issue Invoice as existing one or to issue Credit Note.
2.2.5. Delete
Button to delete opened record. You can delete only those records which have no relation to other ZZ modules. Otherwise you get an error message.

2.2.6. Add Additional data
For some types of records you can add additional data related to opened record. For example, address, note, etc.
2.2.7. Record Functions
For some types of records you can call function related to opened record.
2.2.8. Back
Same functionality as back in your browser.
2.2.9. Back to Grid
Button to return to the Grid from which you entered the detail of the open record.
2.2.10. Browsing Records
Button to browse the previous or next record.
3. Party menu
The menu Party is used for the registration of natural and legal persons. Except last menu point Contracts. All party menu consits from the same table and is separated by the Role assigned to each record. If Role Customer is assigned to the Party record you will find it in menu Customers. If Role Contact Person is assigned to the Party record you will find it in menu Contact Persons. Same logic is with Sales Representative. You can assign more Roles to one record and then you can find this record under these menus. For example Self-Employed persons are Customers and Contact Persons together. However, you do not have to assign any of the roles described above. In this case you will find this entry in the All Parties menu where is no condition for any role.
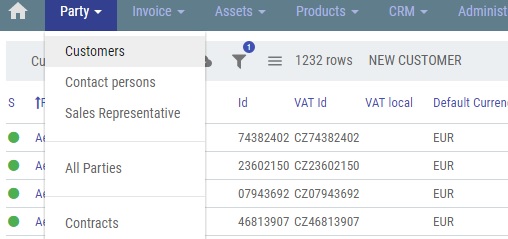
3.1. Customers
All records from All Parties menu with Role Customer. Use the large plus icon on the customer’s navigation bar to activate the Customer Invoice Data Form, [Volvo Logins Form].
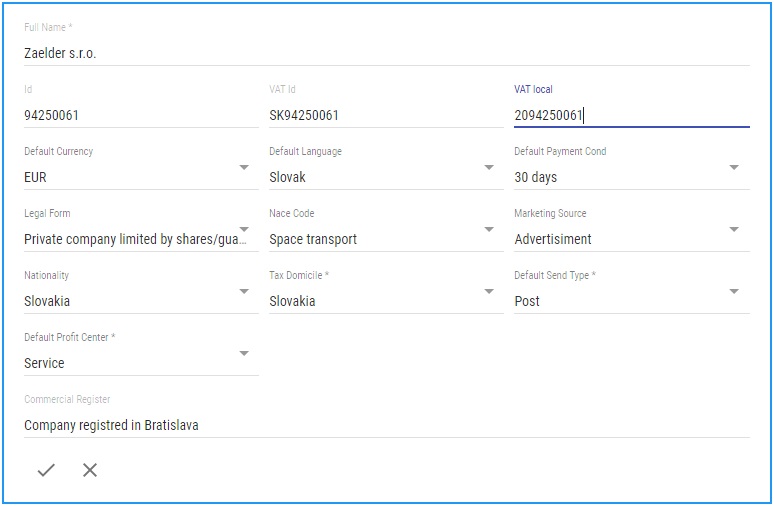
3.1.1. Main Customer Form
-
Full Name. This field stores the Company Name in the case of a legal person or Full name in the case of a physical person.
-
Id, VAT local. Company registration number kept by an official authority. VAT local is only used in some countries.
-
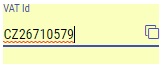
VAT Id. Field for assigned VAT number.
TIP: When creating new record and you put valid VAT number then an icon for adding data from the European Business Register will appear. If you click it Full name, Nationality and Address will be filled in.
-
Default Currency. This currency will be automatically pre-filled in all new orders. Later you can change in that order currency to other one.
-
Default Language. This language will be automatically pre-filled in all new orders. Later you can change in that order language to other one. In your choosen language will be printed PDF document. But must exists template for that language in ZZ repository for your tenant.
-
Default Payment Cond. This payment conditions will be automatically pre-filled in all new orders. Later you can change in that order payment conditions to other one.
-
Legal Form. Choose legal form od the partner.
-
NACE Code. Select the group that best suits your partner’s business. Later it can be used for management statistics.
-
Marketing Source. Choose which way you got this partner from marketing point of view.
-
Nationality. Choose nationality of your partner.
-
Tax Domicile. Choose your partner’s country where VAT tax is paied.
-
Default Send Type. This send type will be automatically pre-filled in all new invoices. Later you can change in that invoice send type to other one.
-
Default Profit Center. This field is used to separate income / expenses or for statistical purposes.
-
Commercial Register. Where required by legislation, This field shall be filled in with the information given by the competent authorities.
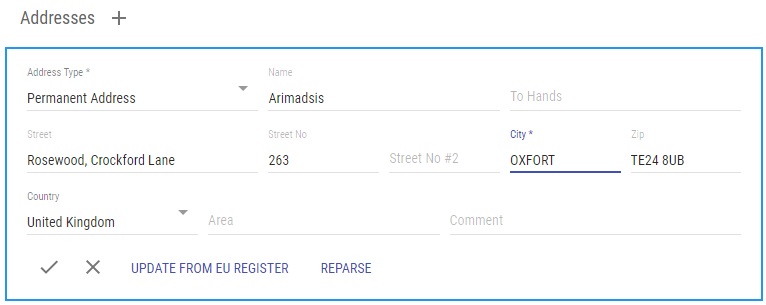
3.1.2. Address Customer Form
-
Address Type. Choose type of address. Permanent address is a must for each Customer. Optional are Post address which is for post communication (e.g. sending invoices, X-mass post card, etc.) or Delivery addresses which are used for deliveries of the goods to the customer.
-
Name. You can save the address under your choosen name.
-
To Hands. You can save a name shown on the Post or Delivery address.
-
Street. Enter the street.
-
Street No. Enter the street number.
-
Street No 2. Enter the street number 2 if exists.
-
City. Enter the city.
-
Zip. Enter the ZIP code.
-
Country. Choose the country.
-
Area. Enter the Area.
-
Comment. You can save here a note about the address record.
-
UPDATE FROM EU REGISTER. In case you have correct VAT number for EU you can click this update button and you get actual address from EU company register.
-
REPARSE. In case you enter just part of the address and you click this button then ZZ will try to add additional data and reparse your address.
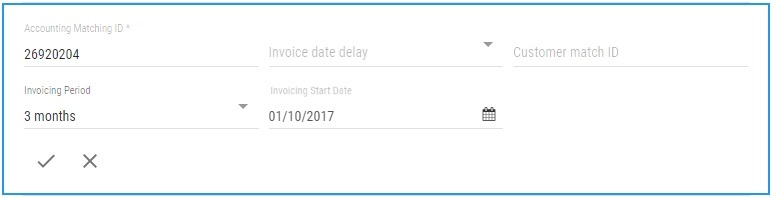
3.1.3. Customer Invoice Data Form
The form Invoice Data in the customer definition is used for automatical accounting transfer or for periodical invoices.
-
Accounting Matching ID. Field for Customer ID used in your accounting program. When exporting data from ZZ this field is used as unambiguous identifier between the ZZ and accounting program.
-
Invoice date delay. If you are using periodic billing and you need to issue an invoice with a delay, enter in this field how many months the invoice will be delayed.
-
Customer Match ID. Optional field for the next mating customer ID. There is no additional functionality above this field, it is informative only.
-
Invoicing period. If you are using periodic billing and you need to issue an invoice for some period then you put here how long the period is.
-
Invoicing Start Date. If you are using periodic billing and you need to start issuing invoices from an exact day then you put here date when it should start.
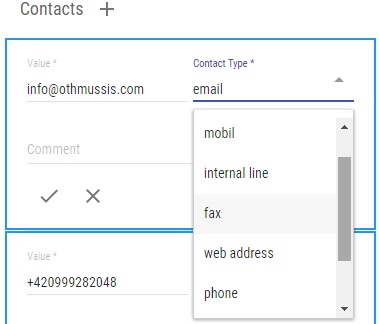
3.1.4. Contact Form
This form is used to save customer contact details.
-
Value. Into this field you put for example exact phone number or email address.
-
Contact type. Choose the contact type related to the field value.
-
Comment. You can save here a note about the contact record.
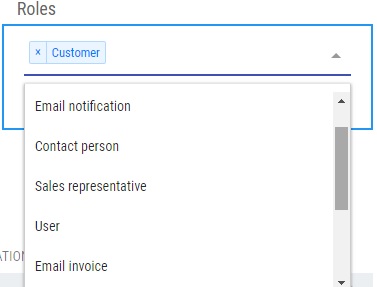
3.1.5. Roles Form
In this form you can choose all roles related to the customer. You can also remove role Customer and put another one. For example Owner or Operator.
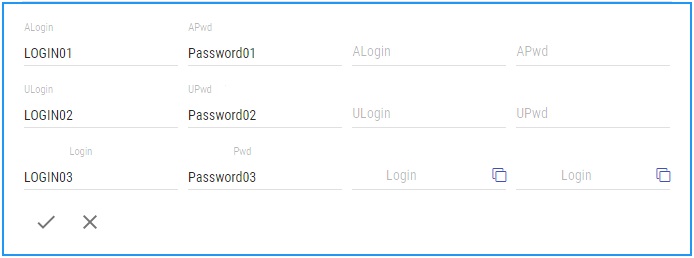
3.1.6. Logins Form
This form is used for evidence of the logins and passwords to other applications for related customer. After the creation of the logins, trucks and related products the customer can get this logins data in the welcome email.

4. Shipment visit
Test base URL:
https://test.zauzoo.com/api
4.1. Shipment visits on whitelist
A GET request to receive shipment visits that are on the whitelist
4.1.1. Request headers
| Header | Description |
|---|---|
X-Tenant |
Tenant ID (e.g. 12) |
Authorization |
API authorization token |
4.1.2. Response fields
| Field | Description |
|---|---|
shipmentVisitId |
Shipment visit ID |
registrationNumber |
Vehicle registration number (SPZ) |
place |
Place parsed from SMS |
4.1.3. Example
GET /shipment-visit/whitelist HTTP/1.1
X-Tenant: 12
Authorization: Bearer eyJhbGciOiJIUzI1NiJ9.eyJqdGkiOiJjYmI2OGMyOC0wNGJiLTQ5YzEtYjlhZi0xMDhmZDFjOWMzYjAiLCJzdWIiOiJhdXRvbmV1bV9hcGkiLCJpYXQiOjE2MDcwODExODEsImV4cCI6NDc2MjcxMDAwMH0.yxg0MPL2xVkpKNfZCBZvo0FiXX8Uo7VX2HaxHW843fU
HTTP/1.1 200 OK
Cache-Control: no-store
Content-Type: application/json
[
{
"shipmentVisitId": 22715,
"registrationNumber": "7p33563",
"place": "12345"
},
{
"shipmentVisitId": 22716,
"registrationNumber": "4j764542"
}
]4.2. Shipment visits whitelist confirmation
A POST request to confirm shipment visit from whitelist
4.2.1. Request headers
| Header | Value |
|---|---|
X-Tenant |
Tenant ID (e.g. 12) |
Authorization |
API authorization token |
4.2.2. Request parameters
| Request parameter | Description |
|---|---|
shipmentVisitId |
Shipment visit ID (PREFERRED) |
registrationNumber |
Vehicle registration number (SPZ) |
4.2.3. Example
GET /shipment-visit/whitelist/confirm?registrationNumber=45445as HTTP/1.1
X-Tenant: 12
Authorization: Bearer eyJhbGciOiJIUzI1NiJ9.eyJqdGkiOiJjYmI2OGMyOC0wNGJiLTQ5YzEtYjlhZi0xMDhmZDFjOWMzYjAiLCJzdWIiOiJhdXRvbmV1bV9hcGkiLCJpYXQiOjE2MDcwODExODEsImV4cCI6NDc2MjcxMDAwMH0.yxg0MPL2xVkpKNfZCBZvo0FiXX8Uo7VX2HaxHW843fU
HTTP/1.1 200 OK
Cache-Control: no-store